IV Pack MERIT Retexture for replace (YTD) 1.1
315
12
315
12
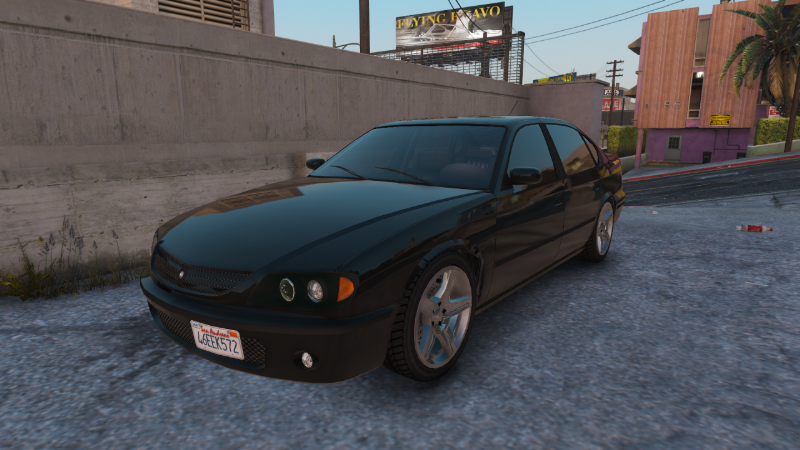
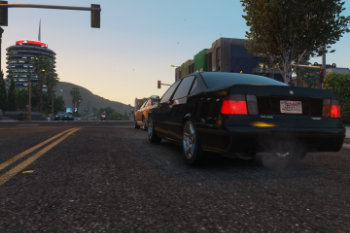
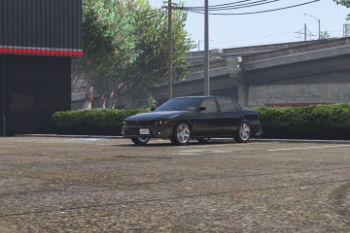
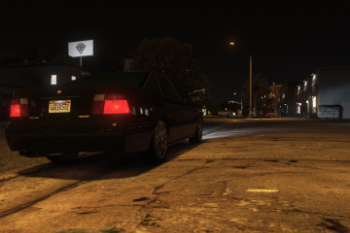
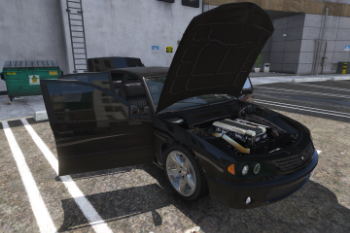
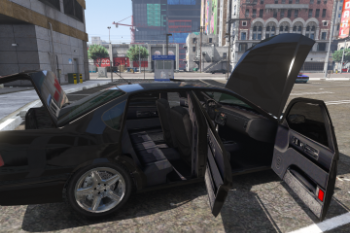
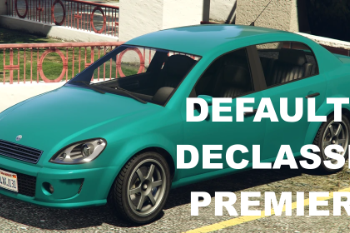
This is a YTD file that lets you convert the Merit from CP's IV Pack to a replacement for the Declasse Premier (vanilla photos included in album) I have the windows tinted via Los Santos customs with Dark Smoke, original windows are not tinted as shown. The Merit is GTA 4's version of a 2000-2005 Chevy Impala SS
Download CP's IV Pack here: https://www.gta5-mods.com/vehicles/ivpack-gtaiv-vehicles-in-gtav
I use Albo's MODDING DLC which you can find here: https://www.gta5-mods.com/misc/modding-dlc-pack-v
Detailed Installation:
After downloading CP's IV Pack, extract the file into a specified location of your choosing. Rght click the "IVPack.oiv" and click "Open With" and select your archiving tool from the drop down menu. After opening, click "Extract To" then "Ok". In the IVPack folder, navigate to CONTENT > PRES > DLC.rpf. This will open in OpenIV. Navigate to x64 > LEVELS > GTA5 > VEHICLES > IVP_VEHICLES. In the search bar on the top right, type "merit." Drag both FRAGMENT OBJECTS to a specified location. Rename the following: "merit_hi" = premier_hi and rename "merit" = premier. Download and extract my .ytd file into said specified location where those two renamed files are. Now you should have three premier files: premier_hi.yft, premier.yft, and premier.ytd. Navigate to MODS > UPDATE > x64 > DLCPACKS > MODDING(or whichever modding dlc you use) > DLC.RPF > x64 > LEVELS > GTA5 > VEHICLES > VEHICLES.RPF. Enter "Edit Mode" and drag and drop all three modified premier files into the directory. Click "Edit Mode" again to stop editing.
Simple Installation:
Download CP's IV Pack, extract the file into a specified location of your choosing. Rght click the "IVPack.oiv" and click "Open With" and select your archiving tool from the drop down menu. Click "Extract To" then "Ok". In the IVPack folder, navigate to CONTENT > PRES > DLC.rpf.Navigate to x64 > LEVELS > GTA5 > VEHICLES > IVP_VEHICLES. In the search bar type "merit." Drag both FRAGMENT OBJECTS to a specified location. Rename the following: "merit_hi" = premier_hi and rename "merit" = premier. Download and extract my .ytd file into said specified location where those two renamed files are. Drag and drop all three files into your custom vehicles.rpf.
If there are any issues with your installment, it was not installed correctly. I'm not responsible for any tangled game files; if you somehow break the game doing this you must be very, very special :)
***ONLY KNOWN ISSUE***
Certain scenarios when driving at maximum speed (via los santos customs mods) can cause the car to be rolled, this is due to the vehicles suspension in vanilla not matching up with the replacement. It's hard to replicate, need to be going at mach speeds downhill to really get it to roll. I need to create a line in vehicles.meta; I'm working on it.
********************************************************************************************************VERSION 1.1
Simplified install instructions
CREDITS:
All credits go to the original model creator, VanillaWorks, and CP with his IV Pack addon, additional credits can be found on CP's IV Pack description.
*DISCLAIMER*
Doing this same process with any other car will result in missing textures
Première mise en ligne : 21 décembre 2022
Dernière mise à jour : 27 décembre 2022
Téléchargé pour la dernière fois : il y a 2 jours
1 commentaire
This is a YTD file that lets you convert the Merit from CP's IV Pack to a replacement for the Declasse Premier (vanilla photos included in album) I have the windows tinted via Los Santos customs with Dark Smoke, original windows are not tinted as shown. The Merit is GTA 4's version of a 2000-2005 Chevy Impala SS
Download CP's IV Pack here: https://www.gta5-mods.com/vehicles/ivpack-gtaiv-vehicles-in-gtav
I use Albo's MODDING DLC which you can find here: https://www.gta5-mods.com/misc/modding-dlc-pack-v
Detailed Installation:
After downloading CP's IV Pack, extract the file into a specified location of your choosing. Rght click the "IVPack.oiv" and click "Open With" and select your archiving tool from the drop down menu. After opening, click "Extract To" then "Ok". In the IVPack folder, navigate to CONTENT > PRES > DLC.rpf. This will open in OpenIV. Navigate to x64 > LEVELS > GTA5 > VEHICLES > IVP_VEHICLES. In the search bar on the top right, type "merit." Drag both FRAGMENT OBJECTS to a specified location. Rename the following: "merit_hi" = premier_hi and rename "merit" = premier. Download and extract my .ytd file into said specified location where those two renamed files are. Now you should have three premier files: premier_hi.yft, premier.yft, and premier.ytd. Navigate to MODS > UPDATE > x64 > DLCPACKS > MODDING(or whichever modding dlc you use) > DLC.RPF > x64 > LEVELS > GTA5 > VEHICLES > VEHICLES.RPF. Enter "Edit Mode" and drag and drop all three modified premier files into the directory. Click "Edit Mode" again to stop editing.
Simple Installation:
Download CP's IV Pack, extract the file into a specified location of your choosing. Rght click the "IVPack.oiv" and click "Open With" and select your archiving tool from the drop down menu. Click "Extract To" then "Ok". In the IVPack folder, navigate to CONTENT > PRES > DLC.rpf.Navigate to x64 > LEVELS > GTA5 > VEHICLES > IVP_VEHICLES. In the search bar type "merit." Drag both FRAGMENT OBJECTS to a specified location. Rename the following: "merit_hi" = premier_hi and rename "merit" = premier. Download and extract my .ytd file into said specified location where those two renamed files are. Drag and drop all three files into your custom vehicles.rpf.
If there are any issues with your installment, it was not installed correctly. I'm not responsible for any tangled game files; if you somehow break the game doing this you must be very, very special :)
***ONLY KNOWN ISSUE***
Certain scenarios when driving at maximum speed (via los santos customs mods) can cause the car to be rolled, this is due to the vehicles suspension in vanilla not matching up with the replacement. It's hard to replicate, need to be going at mach speeds downhill to really get it to roll. I need to create a line in vehicles.meta; I'm working on it.
********************************************************************************************************VERSION 1.1
Simplified install instructions
CREDITS:
All credits go to the original model creator, VanillaWorks, and CP with his IV Pack addon, additional credits can be found on CP's IV Pack description.
*DISCLAIMER*
Doing this same process with any other car will result in missing textures
Download CP's IV Pack here: https://www.gta5-mods.com/vehicles/ivpack-gtaiv-vehicles-in-gtav
I use Albo's MODDING DLC which you can find here: https://www.gta5-mods.com/misc/modding-dlc-pack-v
Detailed Installation:
After downloading CP's IV Pack, extract the file into a specified location of your choosing. Rght click the "IVPack.oiv" and click "Open With" and select your archiving tool from the drop down menu. After opening, click "Extract To" then "Ok". In the IVPack folder, navigate to CONTENT > PRES > DLC.rpf. This will open in OpenIV. Navigate to x64 > LEVELS > GTA5 > VEHICLES > IVP_VEHICLES. In the search bar on the top right, type "merit." Drag both FRAGMENT OBJECTS to a specified location. Rename the following: "merit_hi" = premier_hi and rename "merit" = premier. Download and extract my .ytd file into said specified location where those two renamed files are. Now you should have three premier files: premier_hi.yft, premier.yft, and premier.ytd. Navigate to MODS > UPDATE > x64 > DLCPACKS > MODDING(or whichever modding dlc you use) > DLC.RPF > x64 > LEVELS > GTA5 > VEHICLES > VEHICLES.RPF. Enter "Edit Mode" and drag and drop all three modified premier files into the directory. Click "Edit Mode" again to stop editing.
Simple Installation:
Download CP's IV Pack, extract the file into a specified location of your choosing. Rght click the "IVPack.oiv" and click "Open With" and select your archiving tool from the drop down menu. Click "Extract To" then "Ok". In the IVPack folder, navigate to CONTENT > PRES > DLC.rpf.Navigate to x64 > LEVELS > GTA5 > VEHICLES > IVP_VEHICLES. In the search bar type "merit." Drag both FRAGMENT OBJECTS to a specified location. Rename the following: "merit_hi" = premier_hi and rename "merit" = premier. Download and extract my .ytd file into said specified location where those two renamed files are. Drag and drop all three files into your custom vehicles.rpf.
If there are any issues with your installment, it was not installed correctly. I'm not responsible for any tangled game files; if you somehow break the game doing this you must be very, very special :)
***ONLY KNOWN ISSUE***
Certain scenarios when driving at maximum speed (via los santos customs mods) can cause the car to be rolled, this is due to the vehicles suspension in vanilla not matching up with the replacement. It's hard to replicate, need to be going at mach speeds downhill to really get it to roll. I need to create a line in vehicles.meta; I'm working on it.
********************************************************************************************************VERSION 1.1
Simplified install instructions
CREDITS:
All credits go to the original model creator, VanillaWorks, and CP with his IV Pack addon, additional credits can be found on CP's IV Pack description.
*DISCLAIMER*
Doing this same process with any other car will result in missing textures
Première mise en ligne : 21 décembre 2022
Dernière mise à jour : 27 décembre 2022
Téléchargé pour la dernière fois : il y a 2 jours
Joignez la conversation ! Connectez-vous ou enregistrez-vous pour pouvoir commenter.
.png)
 5mods on Discord